第一步:准备好要用于模板的解决方案
第二步:在解决方案根目录添加文件夹,名为:.template.config

第三步:在 .template.config 文件夹下创建名为 template.json 的文件
第四步:编辑 template.json 文件
{
    "$schema": "http://json.schemastore.org/template",
    "author": "Me",
    "classifications": ["common", "web", "webapi"],
    "identity": "FrameTemplete",
    "name": "FrameTemplete",
    "shortName": "ftm",
    "tags": {
        "language": "C#",
        "type": "project"
    },
    "sourceName": "ServicePlatform",
    "preferNameDirectory": true
}
配置说明:
author:模板作者,必填
classifications:模板分类,必填
name:模板名称,当使用 dotnet new 创建项目时,指定的模板名称,必填
identity:模板唯一名称,必填
shortName:模板简短名称,必填
tags:模板标签
sourceName:指定一个字符串,当使用 dotnet new 带 -n 参数时,-n 参数的值会替换 sourceName 指定的字符串。
特别说明:上图中 解决方案和项目中命名均以 ServicePlatform 开头,若要新建项目能改变名称,此处必须要和你的项目前缀一样,此例中为ServicePlatform
preferNameDirectory:是否生成相同名称的目录,可选。
第五步:安装模板到本机
dotnet new -i <解决方案sln的路径> // 若为当前目录下:dotnet new -i .\ //若为mac、linux:dotnet new -i ./
再执行命令:
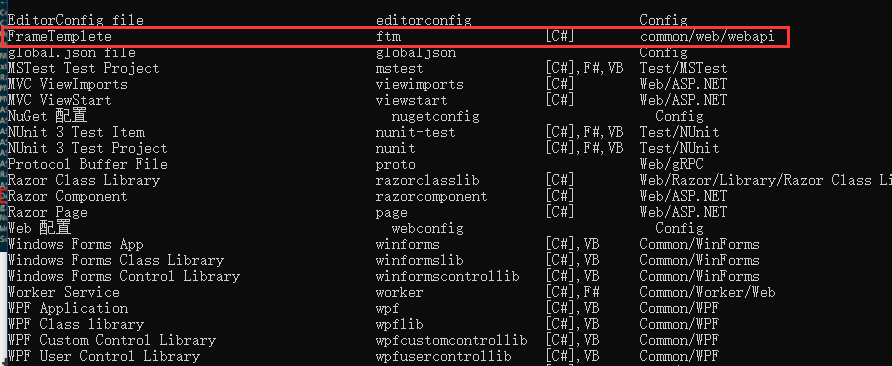
dotnet new -l
即可看到我们刚刚配置的模板,如下图:

第六步:使用模板
dotnet new ftm -n ResourceSystem
命令说明:
ftm 为 json文件中 name 为 FrameTemplete 的 shortName,-n 后的 ResourceSystem 将替换 ServicePlatform 名,这样一个新的 名为 ResourceSystem 的项目基础框架就好了。
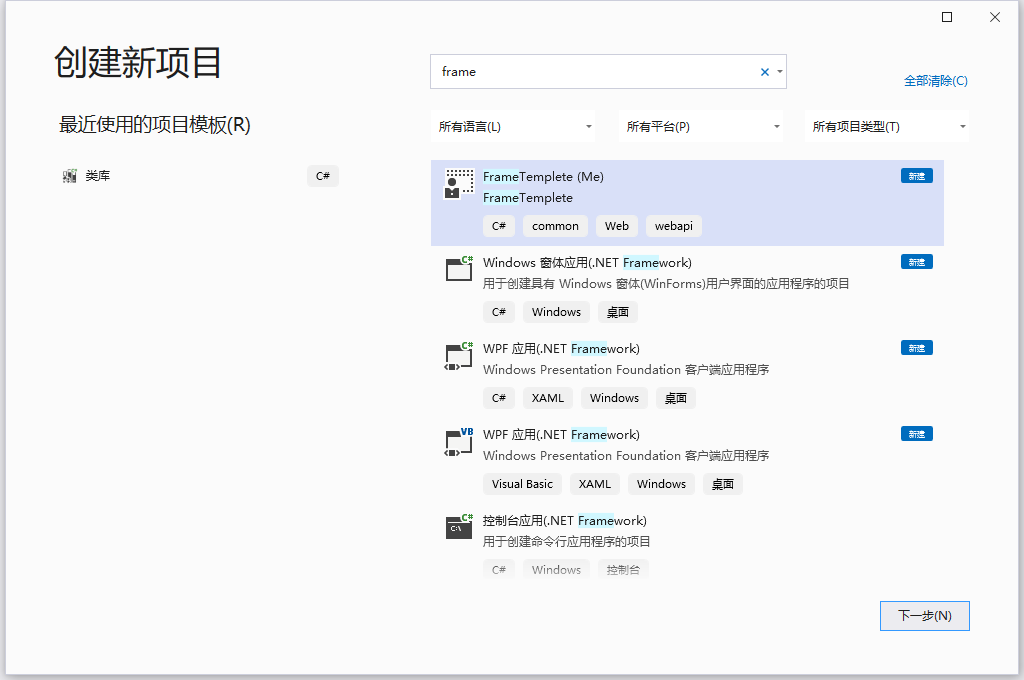
也可以通过 visual studio 来创建项目,在创建项目时,选择我们添加的模板即可,如下图:

我们可以发现,.NET CLI 用的是简写名称(shortname),而visual studio 则为全称(name)。
不过,不论如何,达到目的即可。
这种方式可以快速搭建相似基础框架的项目,大大减少Ctrl+C和Ctrl+V的过程,属于一劳永益的方法。过程也很简单,推荐大家使用。